
Okapi Framework - TutorialsUsing Translation Packages |
|
This tutorial illustrates how to use the Translation Package Creation and the Translation Package Post-Processing utilities included in Rainbow.
The first one allows you to prepare translation kits that can be translated, edited and reviewed with different translation tools. The second one is used to post-process the packages after they have been translated.
Note: There is a newer way to prepare files
for translation: the Translation Kit Creation (and the
Translation Kit Post-Processing) utilities.
See the documentation about the
Rainbow Translation Kit Creation Step for more details.
To complete this tutorial you must have Rainbow v6 installed and working. Note that for Rainbow to run properly you must also have Java 1.6 or later installed on you system.
You should also have a copy of the sample files for this tutorial on your machine, for example in
C:\Tmp\tutorials\turorial_02\files.
Start Rainbow.
To make sure you are starting this tutorial in a fresh environment, you should first create a new project: Select the command New in the File menu, or press Ctrl+N.
It is recommended to start by saving the Rainbow project file. This allows you to safely use relative paths for all the parameters of your project and therefore to be able to move the project and its file around without having to reset any paths.
To save the project select the Save command from the File
menu. Enter a filename with the path of where your tutorial files are. for
example C:\Tmp\tutorials\tutorial_02\files\preparation.rnb.
Select the Input List 1 tab. This is the list where we will enumerate all the source documents to prepare.
Select the command Add Documents from the Input menu, or press Ctrl+Insert. This opens the Add Documents dialog box where you select the source documents you want to prepare. You can also simply drag and drop the documents on the list. All documents must be in or below the input root directory you have chosen for the source, in our case the directory where you saved the project.
Select all the files named file1.xxx where xxx are different
extensions. There are also files in a sub-directory called subFolder.
Now, if needed, you need to associate each file to its filter. The filters are used to parse the documents and separate the translatable text from the code parts of the files. In this example all the files are associated with default filters based on their extensions, so there is nothing special to do.
The next step is to make sure languages and default encodings are set properly. Select the Languages and Encodings tab.
You need to specify the language of the source and target documents, as well as the default encoding to use to read the documents in case they are not in a format where the encoding can be auto-detected.
In this example, the source language is English and we will use French as the target language. We will also use UTF-8 for the source and target default encodings.

Move to the Other Settings tab.
You define here the names of the translated files as they will be generated
during after post-processing. By default they are the same names as the input
document with an additional .out placed just before the final
extension.
In this example we will change the settings and replace the .out
by a .${TrgLang}. The macro ${TrgLang} can be used
anywhere in the output option. It will be replaced at runtime by the code of the
target language (here "FR-FR").

All the previous steps were performed to define general settings that are used with all Rainbow utilities. Now comes the part that is specific to the Translation package Creation utility.
Select the command Translation package Creation in the Utilities menu. This will bring up the dialog box where you set the options specific to the utility and launch it.
The Package Format tab allows you to select what kind of translation kit you want to create. In this example we will use the one called OmegaT. OmegaT is an open-source translation tool.
Select OmegaT in the list of available packages.

Move to the Package Location tab.
This is where you defined the place where you want to generate the
translation kit. There are two things to define: The root output directory and
the package name. Both are combined together to make up the final output
directory. For example, if you define C:\Tmp\TKits as the root
output directory and Pack1 as the package name, the files will be
generated in C:\Tmp\TKits\Pack1.

In our example, we will use the default location which is
represented by a variable: ${ProjDir}. It corresponds to the
directory where the project is saved. And for the name, we will use pack1.
Move to the Options tab.
Here you can specify to compress the package into a single ZIP file. We will not do this in the example.
You can also decide to pre-segment the document. This can be useful when you have some existing translation memory that you want to apply for example. In this example we will not pre-segment.
Move to the Pre-Translation tab.
Here you can specify to leverage existing translation into the package using different translation resources (Pensieve TM, machine translation, etc.). We won't use this option in this example.
At this point all the options we need have been set.
Click OK to start the process.
If all goes well, you will not get any error or warning messages.
The result of the preparation can be seen in the Root of the output directory you specified. You can open that folder from Rainbow by selecting the command Open Last Output Folder from the Utilities menu, or pressing Ctrl+L.
The package should look like this:

The file manifest.xml contains all the information
needed to merge the translation back into the original file formats. You should
never delete, rename or change in any way this file. The same goes for the
original sub-directory. It contains all the files you need to
post-process the translation.
For an OmegaT project, the extracted files are located in the
source sub-directory. These are the documents will will need to
translate. Note that the directory structure has not been ported here: OmegaT
does not allow this. So, instead all the files have their ID as prefix to allow
files with the same name but in different sub-directories to be processed. the
correct directory structure will be re-generated when post-processing the
translated files.
The omegat sub-directory may contain a file called
project_save.tmx that contain any existing translation that was
labeled as "approved" in the original documents. In our example, we have such
file as both the PO and the XLIFF input documents have existing translations
that are already approved.
The tm sub-directory may contain TMX files as well:
unapproved.tmx for any existing translation found
in the input document that was not labeled as "approved" yet. In out example
we have such file as both the PO and the XLIFF input documents have existing
translations that are not approved yet.
alternate.tmx for any alternate translation found
in the input document. In our example we have such file because the XLIFF
input document has a <alt-trans> element for one of its
translation units.
leverage.tmx for any translations found in TMs used when
pre-translating. In this example we do not have such output.
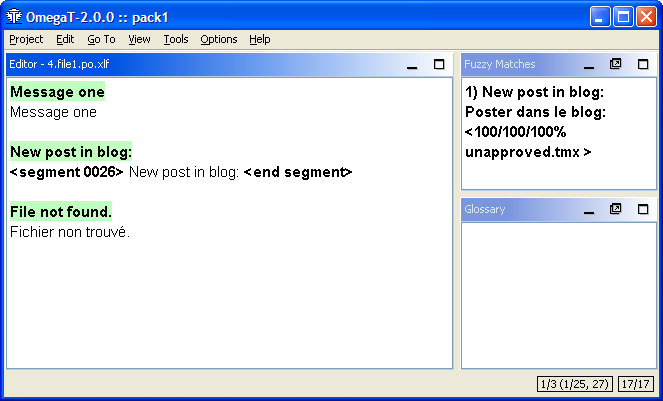
You can now open the project with OmegaT and translate.
Start OmegaT
Select the command Open from the Project menu. And select the directory of the project. The program will open the project files and you can proceed to translating the documents. Any existing approved translation will be set directly. Any other match will be proposed in the Fuzzy Matches window.
When you are done with translating you need to generate the translated files out of OmegaT. To do this select the Create Target Documents command from the Project menu.
This will create a translated version of the documents in the target
sub-directory of the project.
Once the translated files have been generated, you can use the Translation Package Post-Processing utility to merge the translation back into the original file formats.
Start Rainbow
Drop the manifest of the project (manifest.xml) in the
Input List 1 list of Rainbow.
Select the Translation Package Post-Processing command from the Utilities menu. the manifest is read and its content displayed in the Translation Package Manifest dialog box:

If needed you can select which documents you want to post-process.
Click Execute to start the post-processing.
The program creates a done sub-directory in the project where
all the translated final documents are saved. The original directory structure
is also re-constructed when needed.
You should be able to open them with their corresponding applications.